Snowman Ornie Featured at Craft Gossip

I just found out that my Snowman Face Ornie was featured over at the Craft Gossip blog as part of their feature on creative snowman craft ideas. What a nice honor! So thanks to Amanda over at Craft Gossip for this.


Primitive Snowman Ornie


Please check out all the great snowman craft ideas there, as there are some really cute ones.


Craft Gossip Featured

And Happy New Year, one and all! I hope 2011 is filled with love, good things, and lots of creativity!

Fabric Memory Ornies

Well, my fabric memory ornies arrived safe and sound at my mom's in Texas yesterday, and she loved them. So now it's safe to post the other ones I couldn't post when I shared the Sisters Fabric Ornie the other day.

These were made the same basic way as I made the Sisters ornie--using fabric and a vintage family photo, only with slight variations on the embellishments.

This first one has a photo of my great grandmother and my mother, when she was a little girl. I love this photo of them!

Mom and Grandma Fabric Memory Ornie


This next one has a photo of my great grandmother, my Nana (Mom's mother), and my mom again, when she was little. I made 3 of these--one for my mom, one for my sister, and one for me, so we'd each have one that matched.

Mom Grandma Nana Fabric Ornie


I will probably make more of these fabric memory ornies next year. I love how they turned out.

Butterfly Stitches Hang Tag

This is an altered hangtag I created for the Gingersnap Creations Stitches Challenge. The "stitches" could be real or faux, so we could sew...or not sew for the challenge, as long as some sort of stitches are part of the project. I'm also using it for the Fussy and Fancy Friday Anything But a Card Challenge.
Butterfly Stitches Altered Art Tag


I started by making the hangtag itself out of some cardstock scrapbook paper that I had a scrap of. It has some great browns, tans, turquoises and white colors, and (lucky me) it also includes faux stitching. So I knew it would be perfect for the challenge.

Next I found a 3-D sticker of a rose that I liked, along with a butterfly die-cut shape I wanted to use. So I stuck the rose to the tag, and then I used a 3-D-O  (which is basically a piece of foam that has sticky on both sides) to stick the butterfly cutout to the tag and have it stick up in relief like the rose.

Then I added some lace trim to the bottom of the tag, to give it a bit more of a feminine touch. And I also added some button brads here and there to add some variety and embellishment to the tag. And I finished it off with a coordinating light turquoise satin ribbon. It almost looks a bit shabby chic to me too, don't you think? I love how it turned out.

Let It Snow Hang Tag

Well, considering we got our first real snow of the season over the weekend, the timing of this altered hangtag project couldn't have been more appropriate! This is my Let It Snow Hangtag, which I'm entering into the City Crafter Challenge Blog Let It Snow Challenge.

Let it Snow Altered Tag


I started with a simple, plain white hangtag. I took a red rubber stamp ink pad and used it to color the edges of the tag all the way around, which also gives it a sort of distressed look.

The next step was to create the snowman. For that, I used two chipboard buttons in varying sizes, which also have a text/paper finish on them. I created a scarf out of some paper and glued it to the snowman body. Then I found four black button brads and used two for the eyes, and two for buttons on the snowman's body. I also created a hat and a nose out of paper and glued them on, and then I used hot glue to assemble the snowman--and used the bottom brads to affix the snowman to the tag.

With the snowman in place I added the alpha stickers to spell out Let It Snow. And to embellish the tag a bit I added rhinestone gems, and circles I punched out of scrapbook paper. I also used the same paper to attach a decorative edge to the bottom of the tag. The finishing touches were a rubber stamped  black border near the bottom of the tag, and a coordinating black ribbon.

He's quite the happy little snowman and clearly ready for the long, cold winter to come. Can't say I am, but hey, I'll just stay inside where it's warm and be crafty!

Snowman Face Ornie

As I was decorating my Christmas tree the other day, I came across this country primitive ornie that I'd made for a swap a few years ago, but hadn't photographed it at the time. I thought it'd be a nice addition to the blog so I snapped a photo while I was thinking about it. I made this for a country primitive ornies swap through an online community I belonged to.

Snowman Face Prim Ornie


I started with 2 pieces of an off-white felt that I'd cut to the size and shape I wanted. Then I spritzed them with my special grungy sauce mix--though not too much, because I wanted him to be just little a little bit grungy, rather than dirty. ;) I then baked them in a warm oven for about 10 minutes or so, flipping them once, until they were fully dry.

Next I cut orange pieces of felt for each snowman's nose. Then I stitched on the nose, and then stitched on 2 buttons to be the eyes. I kept the mouth very simple and just stitched a series of X's for his smile.

After all the facial features were complete I stitched three sides, added just a bit of fiberfill to round out the face a bit, then stitched the rest of the way on the outside edges of the felt. And I finished each one off  with a green and ivory gingham fabric strip for hanging.

I love the simplicity of country primitive crafts. They are just full of warmth and fun and have a sense of home. And these particular ornies are so easy to make. I think I had to make about 15 or 20 of them for the swap I was in, and it didn't take me all that long to complete them all. And my smiling snowman looks sweet on my tree too!

I've also linked this project up at the Sassy sites blog for their Christmas Creations Using Fabric Challenge. Be sure to take a peek at their blog to see lots of other wonderful and creative holiday fabric creations!


Sisters Fabric Ornie

I've been decking the halls this past week, and trimming the tree as well, and that gave way to some creative inspiration. I decided to make some fabric ornies for my sister and my mom that they can hang on their Christmas trees. And I wanted to also include a vintage photo on each ornie, one that would be special for each of them. So this is the first one I made for my sister, which includes a photo of her and me when we were young.


I started by choosing some fabric that I love and have used with other projects. It has a very vintage feel to me, with a soft, muted tan background and little burgundy rosebuds on it. I cut two pieces of fabric to the size I needed, approximately 3"x4", so that it would be a bit bigger than the photo when it was finished.

Next I used Avery Printable Fabric to print out the photo. The fabric is so easy to use: it can be sewn on, or simply ironed on, which is what I chose to do. After ironing on the photo, then I added my decorative trim around the photo. I used fabric glue to get it in place, and once that dried I also tacked it on with a few stitches to be sure it would stay in place over time. I also added a satin ribbon flower as an accent.

The next step was to put the right sides of the fabric together, and then sew it together on three sides. I left the bottom side open so that I could then stuff it with fiberfill. After sewing and turning and stuffing, I sewed the bottom edge closed. Then I added the lace trim at the bottom, and finished it off with a  burgundy satin ribbon for hanging.

I made some other fabric ornies as well, but I'll be posting them after Christmas, so as not to ruin the surprise for anyone else I'm sending them to. ;)

I love how all the ornies turned out. My only irritation is that I think they would have looked better if I'd added a sepia tone to the photos instead of just leaving them black and white. I think they would have matched the fabric better that way. But oh well. At least I'll know for next time. And either way they are still what I hoped they'd be...a special way to capture moments in time of our family.

I also am using this as an entry into the Gingersnap Creations Vintage Hues Color Challenge, as well as the Craft Your Passion ~ Anything Goes Challenge.

Note: TatteredSisters.com is one of my other blogs. :)

Country Primitive Mitten Ornie

I recently participated in the annual Ornie Swap at Prim Mart, something I try to do every year. There's nothing like creating a bunch of ornies and knowing that you're going to get a box full of handmade ornies in return each year. My tree is full of the most beautiful handmade ornies and I just love it! For this year's swap I did a simple country primitive mitten ornie with a rusty snowflake accent.

Snowflake Felt Craft Mitten


I started by drawing a mitten pattern on some cardstock and then cut it out. I pinned it to two pieces of white felt that I had pinned together and then cut out the 2 mitten pieces, front and back. Next I sewed the two halves together using black embroidery floss. I love the look of the stitching going all the way around, and it's very country and prim! Next I took a black button and used white embroidery floss to sew it to the rusty snowflake accent. Then I used a rusty safety pin to attach the snowflake to the front of the mitten, and I stuffed the mitten with just a bit of fiberfill. Then I finished it off by attaching a piece of embroidery floss to serve as the hanger for the mitten.

I really debated making this mitten ornie grungy...it's definitely the primitive way to go. But I liked it so much the way it was, I decide to just leave it that way. I made 28 of these for the ornie swap, and I got my 28 handmade ornies in return just the other day. They are now hanging on my tree and they look beautiful.

I don't know about the rest of you, but around here, it's beginning to look a lot like Christmas!

Happy Thanksgiving!


Sweet Face of Time Hang Tag

Here's another altered hangtag creation I've made using a less-is-more approach. Sometimes I get a bit carried away with embellishments and details and I forget that it's OK to just do something simple. Yet when I give myself permission to do something simple, I usually love how it turns out.

Sweet Face of Time Altered Tag


I started with a plain manila hangtag that I used my secret grungy sauce mix on to get it good and grungy and give it that aged look. Then I took a fabulous Paper Artsy rubber stamp and stamped on the design, which features a cute child's face, and clock, and some design motifs. To that stamped image I added a black button brad to the center of the clock image. I also added a black leaf sticker, and finished it off with a black ribbon at the top of the tag.

I love how this turned out. Hope you do too. I will always enjoy doing my busier more detailed projects, but it's a nice change of pace to do something a little bit different once in awhile.  I'm also using this for the City Crafter Challenge Blog's Little Children Challenge.


Notions Fabric Hang Tag

This altered hangtag is a bit different than what I usually make, since I usually make hangtags out of paper and blank tags. For this one, inspired by the Gingersnap Creations Sewing Notions Challenge, I created my fabric own hangtag from scratch using fabric!

Notions Fabric Handmade Tag

I started with some lovely vintage-looking floral fabric that is tan in color and has some delicate burgundy-colored rosebuds on it. I cut it to the size I wanted (2-1/2" x 5"). Then I found some scrap muslin fabric that I had already made grungy using my secret grungy sauce and I tore the edges to distress it, and to make it fit on top of the other fabric.  I sewed the muslin to the floral fabric using black thread, to give it some good contrast to the fabrics I was using. I didn't want this to look all perfect and clean-edged; I wanted it to look aged and worn, and a bit rustic. After I sewed on the muslin, I then sewed the two pieces of floral fabric together as well.

Next I gathered my sewing notions and embellishments: a Tim Holz metal key, a copper brad, a brown button, a brown satin ribbon with a pearl bead accent, some tatted lace trim, and a rusty safety pin. I poked a hole in the fabrics to make it possible to attach the key to the tag, and used the brad to do just that. Then I sewed on the button, and then also sewed on the brown button. I finished the bottom edge with the tatted trim, and then used the rusty safety pin to attach the brown satin ribbon to the top of the tag.

I am finding that I really enjoy working with fabric. Sewing isn't one of my stronger skills, so I'll need to keep working at it. But in working on this tag, I was really getting some fun ideas for creative fabric projects I could try. I really had fun with it...except for all the times I needed to thread a needle, which is difficult to do without the bifocals I really need to get one of these days. Darn my aging eyes anyway! I also like the idea of doing a more tattered-style of sewn creations--much less worry about perfection gives me lots more creative freedom (and less stress). And as Martha would say, that's a good thing.

Here's to more fabric projects in the future! Have a great Wednesday.

Mama's Dance

I had so much fun creating in my studio today. I only managed to get one project finished, but sometimes I spend more time in creative thought than in creative action, as was the case today. Sometimes I just have to spend a lot of time making sure everything is as I really like it before I can call it complete.

This project features a vintage photo of my mother. She was not quite four at the time, and she's the picture of prettiness in her fashionable dress of the day. I do believe my great-grandmother made this dress for mom too, which makes it even more special.

Mama's Dance Canvas Art


I used a plain white canvas as the base for this project, since I was going for mostly a black and white color scheme. However, in looking at it (and debating it for quite some time!) I decided that the white canvas was just a bit too white. So I used some Old Lace colored Glimmer Mist to spritz the entire canvas and give it a bit of shimmer. I did the same to the black and white-patterned scrapbook paper that I tore and distressed next, and then adhered it to the canvas. Then I added the photo of Mom, and I used four black brads and some Mod Podge to glue that to the paper.

If you look closely at the photo, you'll hopefully notice the pearl beads I added to represent the necklace Mom is wearing in the photo--it looked like pearls to me, though the photo is kind of small (3x4) so it's difficult to know for sure. But I liked the idea of giving the piece a 3-D effect with the pearls, and I think it looks neat now that they're on there.

After the pearls, I added a black satin bow with a pearl accent to the top of the photo. Then I added some alphas to spell out the word, Dance, because to me, she looks like she's ready to dance. I finished off the edges of the canvas with some decorative black trim. It's difficult to see it in the photo, but it really helped to give it a finished look, and tied in all the black together.

The inspiration for this piece, aside from my cute little mama in her perfectly fashionable little black dress, was the Gingersnap Creations Haute Couture Challenge, the theme of which was fashion. I'm also using it for the Craft Your Passion Challenge for this week.

Family Shadow Box

I use so many vintage photos in my altered art projects. I just love the way they look. So when my mom came for a recent visit, I asked her to bring as many old family photos as she could so that I could start using actual family photos, rather than just vintage strangers that catch  my eye in photographs. Mom brought some wonderful photos, so I'm off to a good start in building a collection that will not only help me to be creative, but will be extremely meaningful for me as well.

For my very first effort, I decided to create a shadow box of sorts. I have several of these small square boxes around, made from old lath board. They measure about 6" square on the outside, about a little over 5" on this inside. To me, these rustic boxes were just begging to be altered and transformed into meaningful family art. And this one features my great Grandma and Grandpa Kephart. Definitely art with heart.

Vintage Photo Shadow Box

I started by finding some decorative scrapbook paper that I wanted to use on the background. I found one a with rose, pink and blue-green colored pattern to it that I really love. So I cut that to size and put it in place in the box. I already knew that I'd be using the photo of my great Grandma and Grandpa, so next I went about looking for the right embellishments. I found a decorative paper element that says Family on it in a Tim Holz paper pack, so I cut that out to use. I also found a great paper rose that has a hint of glitter on, and the color matched the background paper perfectly. I found some old lace that I ran some thread through to create a fan effect under the rose, and I grabbed some old buttons as well, since the paper element has buttons on it, so I thought they would be a nice touch.

I used foam core to help me create depth with the items I placed in the shadow box. I used it behind the vintage photo and the paper element. The different depths of the items is a perfect way to create shadows in the box, and it makes it look more interesting too. I used some foam to raise up one of the buttons as well.

I love this piece, mostly because it has personal meaning for me. Now all I really need to do is find the perfect spot in my home to hang it. And I will definitely be  making more of these shadow boxes too!

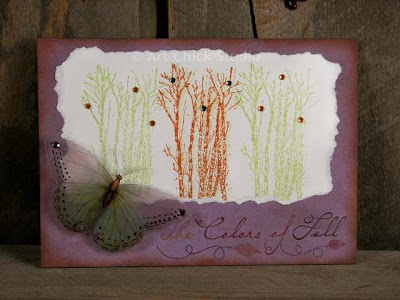
Colors of Fall

This creation is another piece inspired by a Gingersnap Creations challenge; this one was their Color Challenge: Eggplant, Pumpkin, and Avocado, all colors inspired by Fall.

Colors of Fall Art


I started with a simple piece of cardboard. I prefer to use chipboard when I create altered panels, but couldn't find any at the time (I hate running out of things when I'm starting a project!), so I just used what was handy. I covered the cardboard with some scrapbook paper of Tim Holz' that has light purple (the "eggplant") color to it and it's very distressed looking, which I love. Then I took some watercolor paper and stamped on the trees in pattern of three, with 2 sets of trees in green (the "avocado") and one set of trees in a rusty orange color (the "pumpkin"). Next I added rhinestone gems to the trees to create some sparkle; I added orange gems to the green trees, and green gems to the orange trees. Then I tore the edges of the paper and adhered that to my paper-covered cardboard.

I found a plastic butterfly embellishment that has green and a hint of light purple on the wings, and also some orange spots on the wings too. But I decided to add some sparkle to the wings as well, so I added some light purple rhinestone gems there too. I used a piece of foam to adhere the butterfly to the panel, to give it a raised 3-D effect. And I finished it off with a rub-on that says, The Colors of Fall.

So that is my homage to Autumn for this challenge. :)

Paris Arches Altered Hang Tag

This altered hangtag was inspired by the Gingersnap Creations Random Redhead Challenge for November, the theme of which is Arches. I'd never done anything with arches before this, so I wasn't exactly sure how I'd approach it. But I decided to use my love of all things Paris to help me find my way, and I'm very pleased with the result.

Paris Arches Altered Tag


I started with a plain white hangtag that I then covered with some photographic scrapbook paper that I'd gotten as part of a travel kit at Hobby Lobby recently. I'd forgotten I even had it actually, but found it when I was skimming through my paper supply and knew it would be perfect for this challenge. It has a blue-gray tint to it, so I worked with that as the focal color for the hangtag.

Next I began to add the embellishments: an Eiffel Tower sticker,  a vintage style Paris postmark stamp, a dimensional butterfly sticker that I added some blue highlights to, some postage stamp stickers, and another dimensional sticker as well. I also added a sticker with the word Paris on it...I like having a text element in most of my pieces anyway. Then I finished the hangtag off with some blue rhinestone gems and a light blue organdy ribbon.

C'est magnifique, no? LOL :)

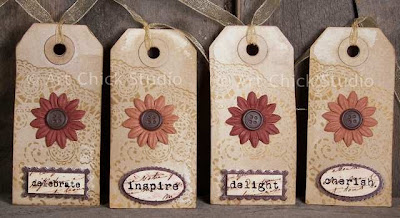
Fall Flowers Hang Tags

Since Autumn is one of my two favorite seasons of the year, the other being Spring, I always enjoy creating fall-themed art projects. And since I'm trying to create more and more sets when I create hangtags, I created this fall-themed hangtag set. I'm also entering this in the City Crafter Challenge Blog's Autumn Leaves Falling Challenge. This challenge required us to create any project using the colors of Autumn Leaves. I've definitely used some of my favorite fall colors!

Fall Flowers Altered Tags

This set of four tags all started out plain, and I used my usual grungy sauce mix to grungy them up. Then I used a doily-patterned rubber stamp to stamp on the doily texture using yellow-gold ink. Next I picked out fabric  sunflower-type flowers in 2 shades of orange and I attached one to each hangtag using a brown metal button fastener. Then I chose four dimensional stickers, each with its own word, and adhered one to the bottom of each hangtag. All that was left after that was to finish each of the hangtags off with a gold organdy ribbon.

I love the colors of Autumn, don't you?!

If you'd like to see more creative projects from other crafters and artists, be sure to take a peek at Today's Creative Blog. Lots of great stuff there!


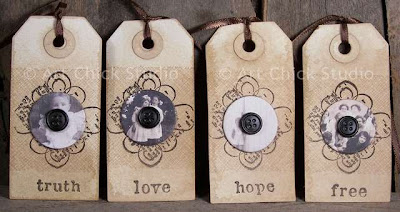
Vintage Photo Button Hang Tags

I've created some different altered hang tags recently...trying to get away from doing only individual hang tags all the time. This set is one I've done using some chipboard vintage photo buttons.

Vintage Photo Button Altered Tags


I started with four plain hang tags and used my usual secret grungy sauce mix to grungy them up. Then I took a rubber stamp that has a sort of textile/fabric texture to it and stamped each tag near the center using brown ink, just to contrast a bit with the grungy background. Then I took another decorative rubber stamp and used black ink to create a decorative ground for the buttons. Next I took four different chipboard buttons, all feature vintage photos of children, and added them using a black metal button fastener, for just an added pop of color. I finished each hang tag off by rubber stamping on a different word to each tag, and adding a brown satin ribbon to each as well.

Time Flies Hang Tags

Every year when the time change is just around the corner, it reminds me how quickly time flies. And, call me crazy, but I think time flies faster and faster the older I get! But hey, what's a gal to do? Well this crafty gal decided to create some hangtags with the Time Flies theme, and I'm using these for the City Crafters Blog Take Flight Challenge for this week...

Time Flies Altered Tags


I took some plain white tags and first used a rubber stamp with a crackle effect to stamp the background and give it some texture. Then I distressed the edges with some brown Distress Ink...I always love the distressed look on tags! Then I just took some rubber stamps that have a Time Flies theme to it and stamped the center of the tag. All that was left after that was a nice black ribbon to finish off the tag.

They're simple but elegant hang tags, and sometimes that's all they need to be. :)

Witchy Woman Canvas

I'm finally getting in the Halloween spirit, where my art is concerned at least. :) I decided to jump into the Gothic Elements Challenge at Gingersnap Creations and the result was my Witchy Woman altered art canvas below.

Witchy Woman Canvas Art


I started with a plain white primed 5x7 canvas, which I then took and spritzed on a generous amount of Coffee House Glimmer Mist. I turned it around a few times to get the little puddles that had formed to run a bit, to get some contrast with the splotchy texture that the mist creates naturally. Next I tore and distressed some turquoise scrapbook paper that has a bit of a coppery pattern design on it and adhered that to the canvas. Then I took some very thin transparent white paper elements that came with some scrap pack I'd bought at Michael's and cut them into sort of lightening bolt shapes. I'm not sure what this paper is called, but it's so thin it's almost like tissue, and it has thicker white streaks running through it.  I used Mod Podge to adhere that in a couple of spots on the canvas, and I think it really does give it a sort of lightening bolt effect, which was perfect for this Gothic witchy theme. Next I took a vintage photo of a young lady and gave her a witch hat and an Alchemy book and Mod Podged her to the canvas as well. I used some black ink to distress the edges of the canvas a bit, and also added some bats. Surely a witch needs some bats, eh? And to finish it off I added the alpha stickers to spell out the word WITCH.

I've never really created Gothic or Halloween-themed art projects until this year. It's new for me, but I'm having fun with it. I'm hoping to create some more before this spooky season passes.

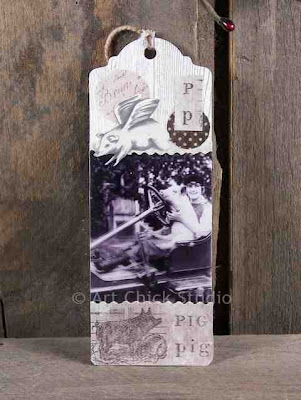
When Pigs Fly and Drive Bookmark

I'm not really sure what prompted me to create this pig-themed altered art bookmark, which I'm calling When Pigs Fly and Drive. I must have gone a little hog wild there for a moment or two. ;)  But I sure had fun making it.

When Pigs Fly Altered Bookmark


I started with a plain white bookmark blank, which I stamped with a wood grain texture rubber stamp. Next I added the vintage photo transparency of the lady and the car-driving pig. Then I remembered seeing some pig-themed paper in a new Tim Holz paper pack that I got recently. So I found that and cut it up a bit.  The pig image at the bottom is part of that paper...so are the P and p at the top of the bookmark. Now the flying pig is from a piece of wallpaper, believe it or not. That fit the theme perfectly. Then I just added some coordinating paper circles, and some grungy twine for the top of the bookmark to finish it off.

I think this is my first animal-themed bookmark. Who knows what might come next!

Believe in Love Ornie

I felt like making an ornie, and decided too that I could incorporate an inchie and use this for an entry into the Gingersnaps Creations Inchies challenge.  This is the result: my Believe in Love Ornie.

Believe in Love Wood Ornie


I started with a simple wood blank, approximately 2x3" in size. I painted it black, then sanded the surface and the edges to give it a distressed look. Next, I stenciled on the word, Believe, in a silver color. Then I took a piece of black and white scrapbook paper and fancied up the edges, and I did the same to part of the packaging for a deck of cards, which is the red and white paper. I glued those pieces together, then found a vintage photo of young lovers sharing a smooch and glued that on top. I adhered them all to the background. I also created a heart out of the same deck of cards packaging and glued that over the "v" in Believe. I finished off the whole thing with a red fabric rosette and some white organdy ribbon.

I think this would look cute on a Christmas Tree, or even hanging on the wall or a peg rack of some sort. And what can I say? I believe in love, so I love playing with that theme any time. Just call me a hopeful romantic.

Caring Hang Tag Magnet

I love playing with ideas for magnets. I made this one awhile ago when I was creating some others, but somehow forgot to post it.

Caring Altered Tag Magnet


I started this with a grungy hangtag, measuring 1-1/2" by 3-1/4".  I used one of my Paper Artsy rubber stamps to stamp on the vintage style image of the woman. Next I dabbed on some distress ink on her face and neck, to give it some more color and depth. Then I distressed a piece of paper and stamped on the word, caring.  And I finished the magnet with a rhinestone gem, to make it look like she's wearing a diamond earring. Then I just needed to adhere it to the magnet. C'est fini! :)

Moments Shabby Chic Hangtag

I was feeling in a bit of a shabby chic mood the other day, so I decided to create an altered hangtag with a shabby chic flair.

Moments Shabby Chic Altered Tag


This tag was plain white to begin with, so I first spritzed it with some rose Glimmer Mist to give it some color and texture.  Next I found a vintage photo of a fairy girl that looked perfect for the tag...and her face reminds me of my oldest niece, Nikki, when she was a little girl. So that made it a great choice too. After I adhered that photo I added some baby blue fabric trim along the bottom of the tag, to contrast and complement the pink mist and roses. Then I added a beautiful pink paper flower to the bottom right corner, and it has a hint of glitter on it to give it some sparkle. I also added some dimensional clock element stickers. And I finished it off with some organdy and pink satin ribbon.

Love it!

Time In a Bottle

OK, who says you can't put time in a bottle?!

Time in a Glass Bottle

Time in a Bottle Glass Art


I'm not sure what inspired me to create this little glass bottle of art, but something sure did. I started with a corked glass vial that is about 2-1/2" high and 1/2" in diameter. I added a little sand...that came straight from the shores of Lake Michigan. Then I stamped the word Time and slightly distressed some purple scrapbook paper and dropped it in the bottle. I finished it with some silver-colored jewelery wire, and some Swarovski crystal beads to add a touch of glam.  This would make a cute novelty gift. :)

You see? You can put Time in a bottle!

4 Princesses Altered Hang Tag

OK, this has to be my biggest altered hangtag to date. It's huge! 4" wide by 7" high, to be exact. It's nice to have one this size because it allowed me to use a much bigger vintage photo image than I normally can do on smaller hangtags. I'm using this for the Gingersnap Creations Black & Red Challenge as well.

4 Princesses Altered Tag


The tag itself already had the black design motif printed on it, and I love the elegant feel that creates for the tag. I added a vintage photo transparency image of 4 ladies in tiaras. They may not be real princesses, but hey, aren't all women entitled to feel like a princess once in awhile?! I framed the transparency with some deep burgundy red fabric trim, and I added a lovely burgundy rose sticker near the top of the tag. I finished it off with a burgundy satin ribbon.

This tag looks just how I hoped it would: simple and elegant.

Gypsy Ladies Glass Tile Magnets

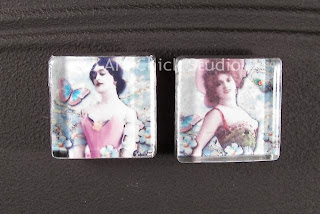
Here are more results of my experimentation in creating glass tile magnets. These are three sets of magnets. [Some of these pics don't look perfectly clear, but the magnets themselves are very clear. These are just so small it was difficult to get a good, clear shot.]


Gypsy Glass Tile Magnets 1

Gypsy Glass Tile Magnets 2

Gypsy Glass Tile Magnets 3


These are all made with clear 1" glass tiles, to which I've affixed vintage photos with some silver-toned foil tape. The photos come from the Itkupilli blog shoppe; the women in the photos look like gypsies to me, and they are surrounded by flowers, greenery, and butterflies. All the tiles have heavy duty round magnets on the back. Love them!

Flower Ladies Glass Tile Magnets

I've just begun to make some glass tile magnets and I'm really having fun with them. I'm using vintage photos and images on them and I love the look of them. Here are my first two sets.

Flower Ladies Glass Tile Magnets

Flower Ladies Glass Tile Magnets


I started with clear glass tiles that are 1" square. The vintage photos I used are from the Itkupilli blog shoppe.  I used silver-toned foil tape to affix the images to the tiles, as well as to finish off the edges of the tiles themselves. Then I added a heavy duty round magnet to the back. Voila. So easy!

I am also going to be making some soldered glass tile magnets, but I wanted to start with something a bit more simple to get my feet wet. I do love how they look, and how easy they were to create.

2 of Spades ATC

Awhile back I created the first ATC I'd planned to do from a deck of playing cards. That was the 3 of Hearts ATC. So I thought it was about time I alter another card in the deck...after all, there are a lot of cards in the deck waiting to be altered! So here's what I did.

2 of Spades Altered Art ATC

I used a Glimmer Mist on the card itself. Wasn't sure how that would turn out since the card's surface is very slick, and it was starting to puddle up on me. So I decided to break out the heat gun and help speed up the dry time. When that was done, I really liked the background; it's very fluid and freeform-looking. And up close, the card does have a nice shimmer to it now, which I like a lot.  Next I added a vintage photo of a fairy girl, who has pink and purple wings.  I added a coordinating butterfly image on the fairy girl, and then I added some purple daisy stickers in the empty opposite corners. I finished the ATC off by adding some pink rhinestone gems to the daisies and to the butterfly.

OK, so 2 altered playing cards down...only 50 to go!


Fly Altered Bookmark

This bookmark features a pretty little vintage photo of a fairy girl, who appears to be thinking about flying away.

Flower Girl Altered Art Bookmark


The background of the bookmark is a patterned cardstock paper; it has a neat pattern combined with old text and distressing in creams and hints of green. I added the fairy girl, and then directly under her added some coordinating paper that has a stitched look. I also added a fabric flower with a bronze brad to accent the fairy. I also added some alphas to spell out the word FLY.  And under that I added a pretty butterfly sticker. I finished it with some gold organdy ribbon.

Paris Altered Bookmark

I made another altered bookmark, following one of my favorite themes: Paris.  I love the whole idea of Paris and hope one day I can visit there to see it in person.

Paris Altered Art Bookmark


The background is a cardstock paper with a brown and turquoise pattern that appears to have a texture to it.  I love the aged look that creates for the bookmark. To the bookmark background I added a vintage photo of a woman, a vintage photo of the Eiffel Tower and an image of some letters, all of which have distressed edges.  Along the bottom of the tag I added some torn and distressed paper with a sticker that reads, Paris.  And I finished it off with a coordinating brown satin ribbon at the top.

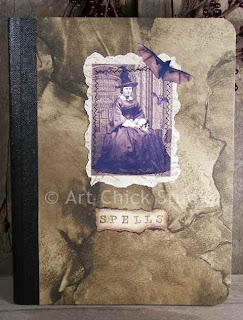
Spells Altered Journal

This altered journal is full sized, made using a standard composition book. I was feeling in quite the witchy mood when I made it, so it seemed appropriate at the time.


Spells Altered Art Journal


For the background of this altered journal, I actually used a piece of wallpaper from my old wallpaper collection. I loved the look and feel of it, and it seemed just right for this book of Spells.  I used a great vintage photo of a woman, wearing a witch hat, which I stitched onto some coordinating scrapbook paper to compliment the background.  I also added an extra bat photo to the upper right of the witch photo. Then underneath the main image I created the Spells title by stamping the letters onto torn and distressed cardstock.

This one was really fun to create, and different from the fairy images I love to use so much. I really love how it turned out.

Time Stands Still Altered Journal

This is another mini altered journal I created for the store (soon to open!).

Time Stands Still Altered Journal


The cover of the journal has a black and creamy paisley design motif. To that I added a vintage photo of a fairy girl, who's wearing a green hooded cape. I love the face on his girl, it's so sweet! I added a large yellow rose sticker, along with a photo of a smaller butterfly. Underneath that I added a dimensional black sticker that reads Time Stands Still.  And on either side of that sticker I added a yellow rhinestone gem, to add a little sparkle.

These journals also feature straps to keep them closed, along with file pockets inside the back cover.

Giggle Fairy Altered Journal

I made some new mini altered art journals to add to the store. I wanted to add something in a different size with some simple but elegant designs, so here's the first one I came up with.

Giggle Fairy Altered Art Journal


The journal itself has a black and ivory colored design motif. I added a vintage photo of a cute little fairy girl, who appears to be trying to stifle a giggle.  I also added some rhinestone gems to the fairy's wings, along with a glittery crown. I finished it off with a metal bracket framing the word giggle, which is on some coordinating scrapbook paper.

These journals come with straps to hold them closed, and they also feature a file pocket inside the back cover, which I thought was a neat touch.

Love Altered Hearts

When I was shopping at Michael's recently, I found some flat wooden hearts that I thought would be perfect for an altered art project. I had my husband drill a small hole on either side of the hearts so I could make them into hanging hearts. I decided that Love would be my theme for this set of 2 hearts. I'm also using these for the City Crafter Challenge Blog's Heart Challenge.

Altered Art Love Hearts


I started by painting the back of each 3" heart, and the front edges, black with craft acrylics. Then I picked out two different scrapbook papers with black and white colors on them; one is a toile pattern and the other is just an ornamental pattern. I Mod Podge'd those papers to the front of each heart. Then I used copper ink on a text stamp and stamped over the middle part of the paper on the hearts. (If you click on the image, you'll get a larger view and the text will be more visible there. )

I used digital collage sheets, in inchies sizes, to find the vintage photos I wanted to use. I got these great images from Itkupilli. I backed each image with some scrap wallpaper, which I cut with paper edge shaper scissors and adhered them to the paper-covered hearts.

I stamped the words "hope" and "love" onto some grungy paper, which I also distressed a bit with some ink. I adhered those to the heart, and also added a letter "X" sticker to one heart (for kisses) and a letter "O" sticker to the other heart (for hugs). And I added a small semi-glittered butterfly sticker to each heart too. The final touch was to add some deep red ribbon to each heart for hanging.

I just love how these hearts turned out. I think I'm going to hang them in my bedroom somewhere! And I see the potential for lots of other altered hearts in the future. I'd like to find some bigger hearts too so I can do different sizes.

Dylan's Sunflower

Had to share this photograph here because I just think sunflowers are so beautiful. This one was started from seeds by my grandson, my daughter and myself (along with several others). We've been nurturing it since spring and it is now around 12 feet tall! (You'll want to click to see the full view--much prettier that way!)

Dylan's Sunflower Photo


Funny how something like this can just make you smile. Dylan can't believe how tall this sunflower got.  It's really the first one he's ever seen, so he wasn't sure what to expect. This one is the tallest of the 3 that survived our planting. We'll have to get some seeds from it and plant some more next year.

I think this would make a great watercolor painting too at some future date.  :)

What Mona Wants Altered Hang Tag

This fun little altered hangtag was made for the Famous Painters or Paintings Challenge and Gingersnap Creations.  In celebration of paint and painters, we had to create an artwork that would pay tribute to an artist or painting that we love. Well, I love Leonardo da Vinci, and one of his most famous works is the Mona Lisa. So she (and he) was my inspiration.

What Mona Wants Altered Art Tag


I started with a tag background from 7 Gypsies. Then I added a glossy image of the Mona Lisa from an old calendar. Next I tore and distressed some cardstock and adhered it at the top and bottom of the image of Mona Lisa, to serve as a frame. I stamped on the text, then I added a Fleur-de-lis sticker, some tatted lace trim, a paper rose, and a butterfly image. And I finished it off with a coordinating green satin ribbon.

C'est magnifique, no? I love how it turned out!

Imagine Altered Bookmark

It's only a paper moon,
sailing over a cardboard sea,
but it wouldn't be make believe
if you believe in me.

(Jim Reeves song, It's Only a Paper Moon)

I just had to start off with the lyrics to the Paper Moon song, since that's what I heard in my head as I was making this altered bookmark.

Imagine Altered Art Bookmark


The background is a very soft metallic, pastel green, patterned cardstock paper, which I added a decorative bottom edge to. Next I added some coordinating cardstock near the top of the bookmark, to which I stamped on the word Imagine. Next I cut out some pink butterfly wings to turn this vintage photo of a girl into a fairy. Then I adhered them to the bookmark, and added a pink roses sticker, which also has a sprinkling of glitter on it (or is it fairy dust?). I finished the whole thing with a coordinating pink satin ribbon.

I love this little vintage fairy, sitting on her paper moon. Kind of has a teensy bit of a shabby chic flair to it, don't you think?

French Fairy Altered Bookmark

Who doesn't love a pretty little bookmark? I wanted to use a vintage photo of a French woman on this one and turn her into a vintage fairy...so that's exactly what I did.

French Fairy Altered Art Bookmark


I used a turquoise blue patterned cardstock for the background. The colors seemed to go perfectly with the French femme that I added next, along with wings to make her look more like a fairy. Then it was time to embellish. I added a bit of torn and distressed contrasting paper to the top of the bookmark. And I added some distressed tag art, a sticker and a butterfly photo at the bottom of the altered bookmark. I also decided to shape the bottom edge of this bookmark, to make it a little more unique.  And I topped it off with some ivory organdy ribbon.

She does look like a French fairy, no?

Beauty Altered Bookmark

After purchasing a lovely new rubber stamp recently of a woman's face, I decided she would be the perfect subject for a new altered bookmark.

Beauty Altered Art Bookmark


The bookmark background is a piece of scrapbook cardstock that has a text design on it. I stamped the rubber stamp art image right on the background itself. Then I added some torn and distressed paper, in a soft aqua color, above and below the image. Next I added some stickers of some delicate pink roses, and finished it off with some ivory organdy ribbon.

I think it turned out so  soft and elegant looking. I love it!

Birdsong Altered Hang Tag

I created an altered hang tag for the Tag Tuesday weekly challenge, the theme of which is  Christmas Colors in July. We had to use the traditional red and green Christmas colors, but not make a Christmas tag.  So what I came up with is called Birdsong. I also decided to use this for the Get Your Craft On Tuesday weekly challenge.

Birdsong Altered Tag


Now, I didn't go crazy with the red and green, as you can see. But that is the beauty of these challenges: lots of room for interpretation and creativity! So I started with a plain manila hangtag that I then spritzed generously with a coffee-colored Glimmer Mist. I then distressed the edges a bit too with some Distress Ink. I knew I wanted to use the bird image, because he has some lovely greens in his feathers, and I found him in an old wallpaper book I had in my studio. So then I hunted around for what I wanted to surround the bird with, and I found these beautiful white flowers, with just a hint of red at the centers. They were perfect! They even have a hint of glitter on the edges, which goes nicely with the shimmer created by the Glimmer Mist. So I adhered them all to the tag, and then just to add a little something extra, I found a 3-D bee sticker to add to one of the flowers. And I finished it off with an ivory organdy ribbon.

Life's a Beach ACEO

This week, Gingersnap Creation's has Sunshine as the theme for their Random Redhead Challenge.  So I decided to make a new ACEO for the challenge, and use an altered art touch. The result is called Life's a Beach. :)

Life's a Beach Altered ART ACEO


My jumping off point was the vintage photo of the lovely beach beauty.  So I started with her and went from there. I used some illustration board for the base, which I sprayed liberally with some Glimmer Mist that I just purchased, in a coffee sort of color. Then I used a piece of wallpaper border that had a wave shape design, and cut the wave out and adhered it to the background. Next I added the beach area on the lower left, that is actually from the original image with the beach beauty. I tore it and distressed it to give it some texture and depth. Then I adhered the image of the gal to the bottom right. I added a copper-finish metal gear to act as the sunshine in the piece, along with a butterfly sticker. And I finished it off with the words Life's a Beach, which I stamped and distressed.

And you know, if I could go to a beach wearing a swimsuit like they did back in those days, I might actually go swimming! LOL

Explore Hang Tag Magnet

Now this is a simpler Hang tag Magnet I'm calling Explore. Not quite as busy as the others I've made so far, but I like the subtlety of it.

Explore Altere Art Tag

Using the small sized plain hang tag, measuring 1-1/2" x 3-1/4", I first used my usual grungy sauce mix to get the tag grungy'd up. It always creates that aged appearance that I love so much. I also used some walnut stain Distress Ink to distress the edges a bit. Then I stamped on a mesh background texture in brown ink, and added the key image in black ink on top of that; and I stamped on the word explore in black ink as well. I finished it off with the two golden-colored rhinestone gems on the key.

Dream Hang Tag Magnet

Another altered art creation as I was on a roll creating my new hangtag magnets is this, Dream Hang tag Magnet.
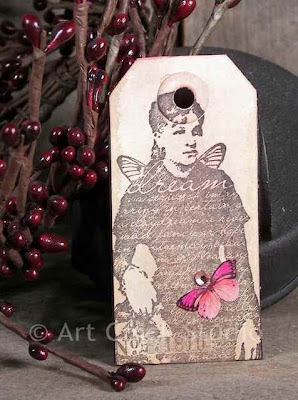
Dream Altered Art Tag


My 1-1/2" x 3-1/4" hang tag started out plain, but I did my usual grungy magic to grungy it up. I always like the way a grungy tag looks! I also added a bit of rose-colored Distress Ink to give it just a subtle hint of color. Then I stamped on the image of the woman, which is from Paper Artsy. She fits perfectly on the tag, don't you think? Then I finished it off with a pink butterfly photo and a pink rhinestone gem.

Paris Hang Tag Magnet

I have a fondness for creating things with a Paris theme...probably because that's one of the cities I dream about going to someday. So this Hang tag Magnet goes nicely with that theme.

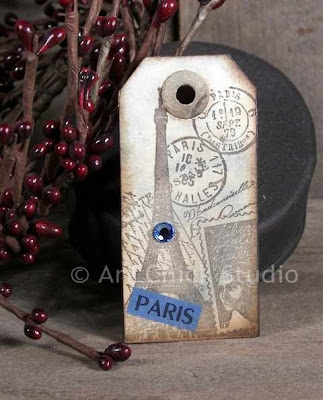
Paris Altered Art Tag


Again I started with a plain hang tag measuring 1-1/2" x 3-1/4" that I grungy'd up using my special grungy sauce mix. Then I stamped on a Paris-related image using a stamp I got from Paper Artsy. I love their stamps! And this one has a definite collage look to it. I also used some blue Distress Ink here and there to give it just a hint of color (not easy to see in the picture). Then I added the Paris sticker and a blue rhinestone gem. Voila! The Paris Hangtag Magnet.

Au revoir.

Love Hang Tag Magnet

Have been busy working in the studio making art for me, and for the upcoming online store. One of things I created was something new for me: Hang tag Magnets. They are magnets made from altered hang tags. I am loving them! The first one I created is called Love. I'm also using this for today's challenge at Tag Tuesday, the theme of which is Faces.

Love Altered Art Tag


I started with a plain hang tag, which is 1-1/2" x 3-1/4", and I grungy'd that up with my own grungy sauce mix. Then I used a soft copper metallic ink and stamped on a doily design for some texture. Next I distressed the edges with some Distress Ink. Then I took an inchie size vintage photo of couple and adhered it to some distressed cardstock paper. I finished it off with the word love and a golden rhinestone gem.

I'm going to do a whole series of these...some for my new store, and some just for me (and friends!). So fun to make.

Beauty ACEO

Since I'm going to start selling things on the soon-to-open Art Chick Studio Store, I've started making ACEO's (Artist Cards, Editions and Originals) instead of just ATC's (Artist Trading Cards), since ATC's are meant to be just traded, rather than sold. So this is my first official ACEO, called Beauty.

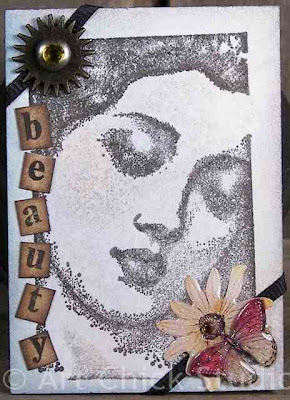
Beauty Altered Art ACEO


I started with a standard ATC-sized illustration board background. I then used some Tim Holz Distress Ink to add some hints of blue and rose over the entire background.  Next I added a rubber stamp art image of a woman's lovely face in black ink. Then I added some black, textured fabric ribbon around the opposite corners. I added a butterfly and flower sticker to the bottom right corner, and a metal gear and brad to the upper left corner. And I finished it all off with distressed letters, spelling out b-e-a-u-t-y on pieces of paper.

This turned out better than I expected actually. Now I just need to make a few more!