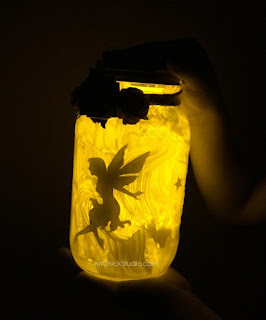
Recently my daughter sent me a link to a video about a Fairy Lantern project. She thought I might like to do the project with my granddaughter, and she knows I love fairies. So my granddaughter, Destiny and I made our Fairy Lanterns last week.
We didn't create our fairy lanterns exactly like what we saw in the video. We looked at several Fairy Lantern videos on YouTube to get lots of inspiration and then we just did our own thing. But you'll see in this video that they used paint on the inside of the glass to give it a frosted look. That is what Destiny did with hers. In other videos, most people used tissue paper that they Mod Podged to the outside of the jar to create the frosted look. That is how I created mine, so that we'd have experience creating them both ways.
Here is Miss Destiny with her finished Fairy Lantern, which she loves.
We added some twine and roses to the outside of our jars, and a little glitter here and there. And we used flameless battery-operated votives for our lights on the inside. We also added a few star stickers on the inside.
Here's a pic of my Fairy Lantern--the one with tissue paper on the outside.
By the way, the fairies we used were pre-cut cardstock fairies that I purchased from a shoppe on Etsy. You can find those by clicking here: MentalEpisodes
I really love how both of the lanterns turned out. They both have a different look. If you want a smooth finish then I'd suggest that you use the paint option on the inside of the jar. We just used regular acrylic craft paint. I like how the tissue looks on the outside though too.
If you need more inspiration, just have a look around YouTube; there are tons of videos on how to make your own Fairy Lanterns.


